
Thanks to numerous plugins, WordPress makes it easy for people to get in touch with you. Whether it’s potential clients looking to hire you or potential customers with questions before purchasing, a contact page with your favorite WordPress form plugin is all it takes.
The beauty of WordPress form plugins is that they will usually send a notification to your email address, letting you know a person filled it out. Some forms will even forward the entire message to you.
Thanks to Zapier.com you can also have the form data sent right to TextP2P. The contact will be adding to the TextP2P list you choose, and a workflow can be setup which is attached to that list so the person gets an immediate or series of texts, emails, or RVMs.
What Is Zapier?
Zapier is an online application that connects two or more apps and allows you to sync data between them or import data from one app into another.
For example, you can use Zapier to:
- Automatically add each new blog post you publish to a Google spreadsheet and store its URL so you can easily re-share it later
- Add new WooCommerce orders to a Google spreadsheet or add new WooCommerce customers to your email list provider
- Add a new task in a project management tool such as Asana or Trello whenever someone submits a form
- Create new contacts in a CRM like HubSpot, SalesForce, or TextP2P from form submissions
- And more.
Zapier offers a free and a paid plan so you can freely experiment with it and see different ways you can automate your business. By automating boring or repetitive tasks in your business, you can save time.
This allows you to focus your energy on more productive tasks such as marketing your business, connecting with influencers, and coming up with new ways to serve your clients and increase your profits.
How to Use Zapier With WordPress Form Plugins
Now that you know what Zapier is and how it can benefit your business, let’s take a look at how you can integrate it with some of the most popular WordPress form plugins.
For the purposes of this tutorial, I will be using the Contact Form 7 plugin and CF7 to Webhook plugin, both of which can be downloaded from the official Wordpress repository.
The Contact Form 7 has a 4-star rating and over 5 million active installs and it’s also one of the most popular free contact form plugins out there.
Also an easy solution is to install the TextP2P messaging plugin which adds a widget icon to the bottom right of every screen on your website and it allows people who visit your site to text you. It also stores their contact information into a list that you choose, and no Zapier integration is needed for this option.
To proceed with connecting Contact Form 7 to TextP2P follow the steps below:
Step 1: Install Contact Form 7 and CF to Webhook (Premium) Plugins
Login to your WordPress dashboard and go to Plugins > Add new. Search for the Contact Form 7 and CF to Webhook plugins and then install them and activate them.
If you already have Contact Form 7 installed, then you only need to search for CF to Webhook plugin, install it, and activate it on your site. The good news is that the Contact Form 7 will already create the initial contact form which we will use for this tutorial.
Step 2. Create Your Zapier Account
Go to Zapier.com and create a Zapier account. Since the CF to Webhook is a premium app it will require that you have a paid account. If you already have a paid Zapier account, then you can proceed with the next step.
Step 3: Make Your Zap
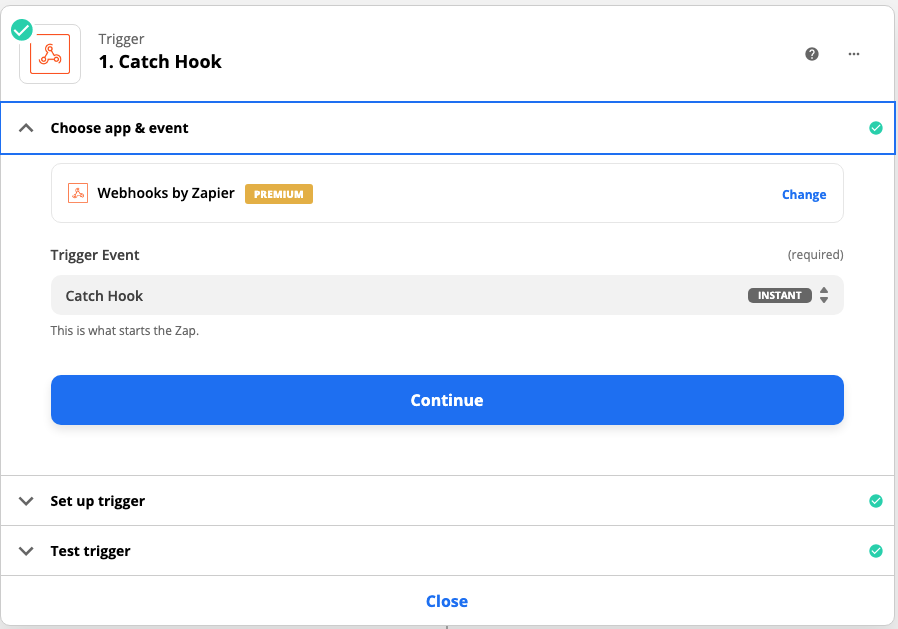
In Zapier, click on the Make a zap button and select Webhooks under Built-In Apps. On the next screen, select the option to Catch Hook. Zapier will now give you a hook that you need to copy and paste to your contact form.
Step 4: Connect Your Contact Form to Zapier
Go back to your WordPress dashboard and navigate to Contact > Contact Forms. Hover over the existing contact form and click on the Edit link under it.
Click on the Zapier tab and paste the hook in the Webhook URL box. Be sure to also check the box that says Send to Zapier. Save your changes.
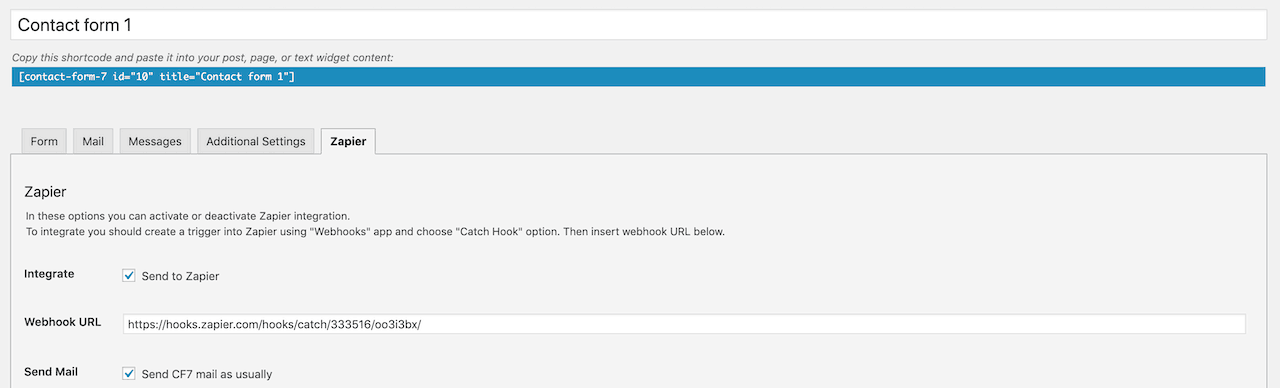
Also be sure to edit the form to require them to enter their cell number. Below is the code snippet:
<label> Your Cell Phone
[tel your-phone] </label>
Step 5: Complete Zap Setup
The only thing that’s left to do now is to complete the Zap setup and tell Zapier where we want to send the data, and we want to send it to TextP2P.
Go back to Zapier and you press the button that says “I did this” under the webhook step. Zapier will then test to make sure it can grab the information. Once the test is done, you’ll see a notice that says your zap is missing an action step. Let’s add that step now.
Click the link and you will be taken to a screen where you can choose the app that you want to connect with your form. Search for the TextP2P app and select it. You will need to connect to your TextP2P using your application using your API username and API secret key which you will find on your application screen in TextP2P.
Then set your Action to be Create Contact in TextP2P
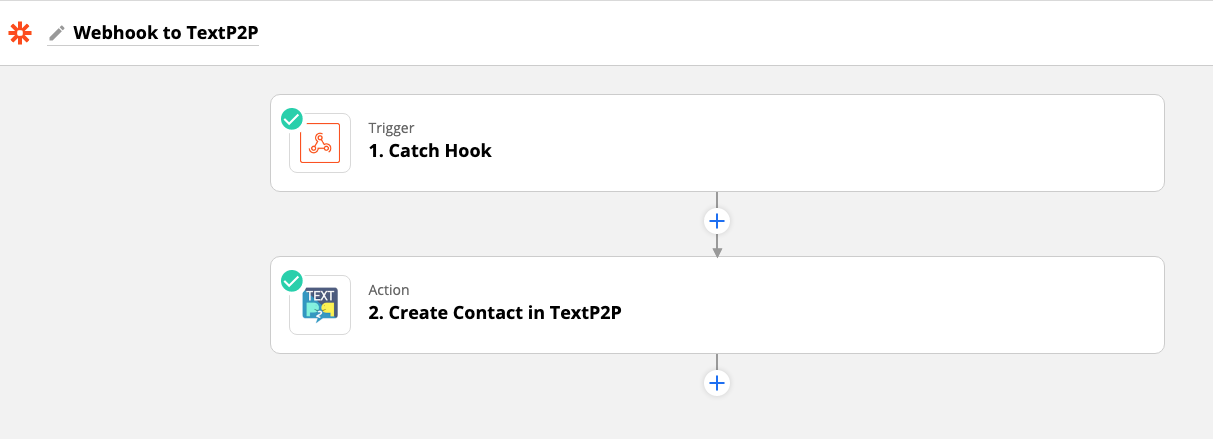
Map the form fields to the corresponding fields in the TextP2P app and click continue. Zapier will then send test information to your TextP2P list. When you see the success message, all that’s left to do is to turn your Zap on.
Other WordPress Form Plugins That Can Be Integrated With Zapier
If you’re not a fan of Contact Form 7, fear not as there are a few other WordPress forms that can be integrated with Zapier.
- Ninja Forms – Ninja Forms is another popular form plugin with a 4,5-star rating and more than a million active installations. You can download the plugin for free and extend its functionality with dozens of free and paid addons. The premium addons include a Zapier addon which is available for $49/year and allows you to connect your Ninja forms to Zapier.
- WP Forms – WP Forms has a 5-star rating and more than 2 million active installs. It uses a drag and drop form builder so creating forms is easy with this plugin. To use the Zapier integration, you will have to upgrade to the Pro version of the plugin which is available for $199.50/year.
- Gravity Forms – Gravity forms is a well-known premium form plugin for WordPress. Their Zapier integration is available as a part of the Pro version which costs $159/year.
- Caldera Forms – lastly, the Caldera forms plugin features 4,5-star rating and has over 200000 active installs. The plugin offers the basic contact form functionality for free and offers more features with free and paid addons. One of their paid addons includes Zapier integration and is available for $74.99/year.
Comments
0 comments
Please sign in to leave a comment.